5.15.2012

Pencil Project - Cabo Bridal Shower

I was looking for mini pink pencils for a game we are going to play at the bridal shower in Cabo. I couldn't find exactly what I wanted so I decided to make them. The shower colors are pink, orange and gray. We stuck with pink and grey for the pencils.
Supplies - Purchased at Michael's - Pink spray paint, floral foam, gray paint. Purchased at Office Max - Golf pencils. Purchased at Polka Dot Market - hot pink washi tape.
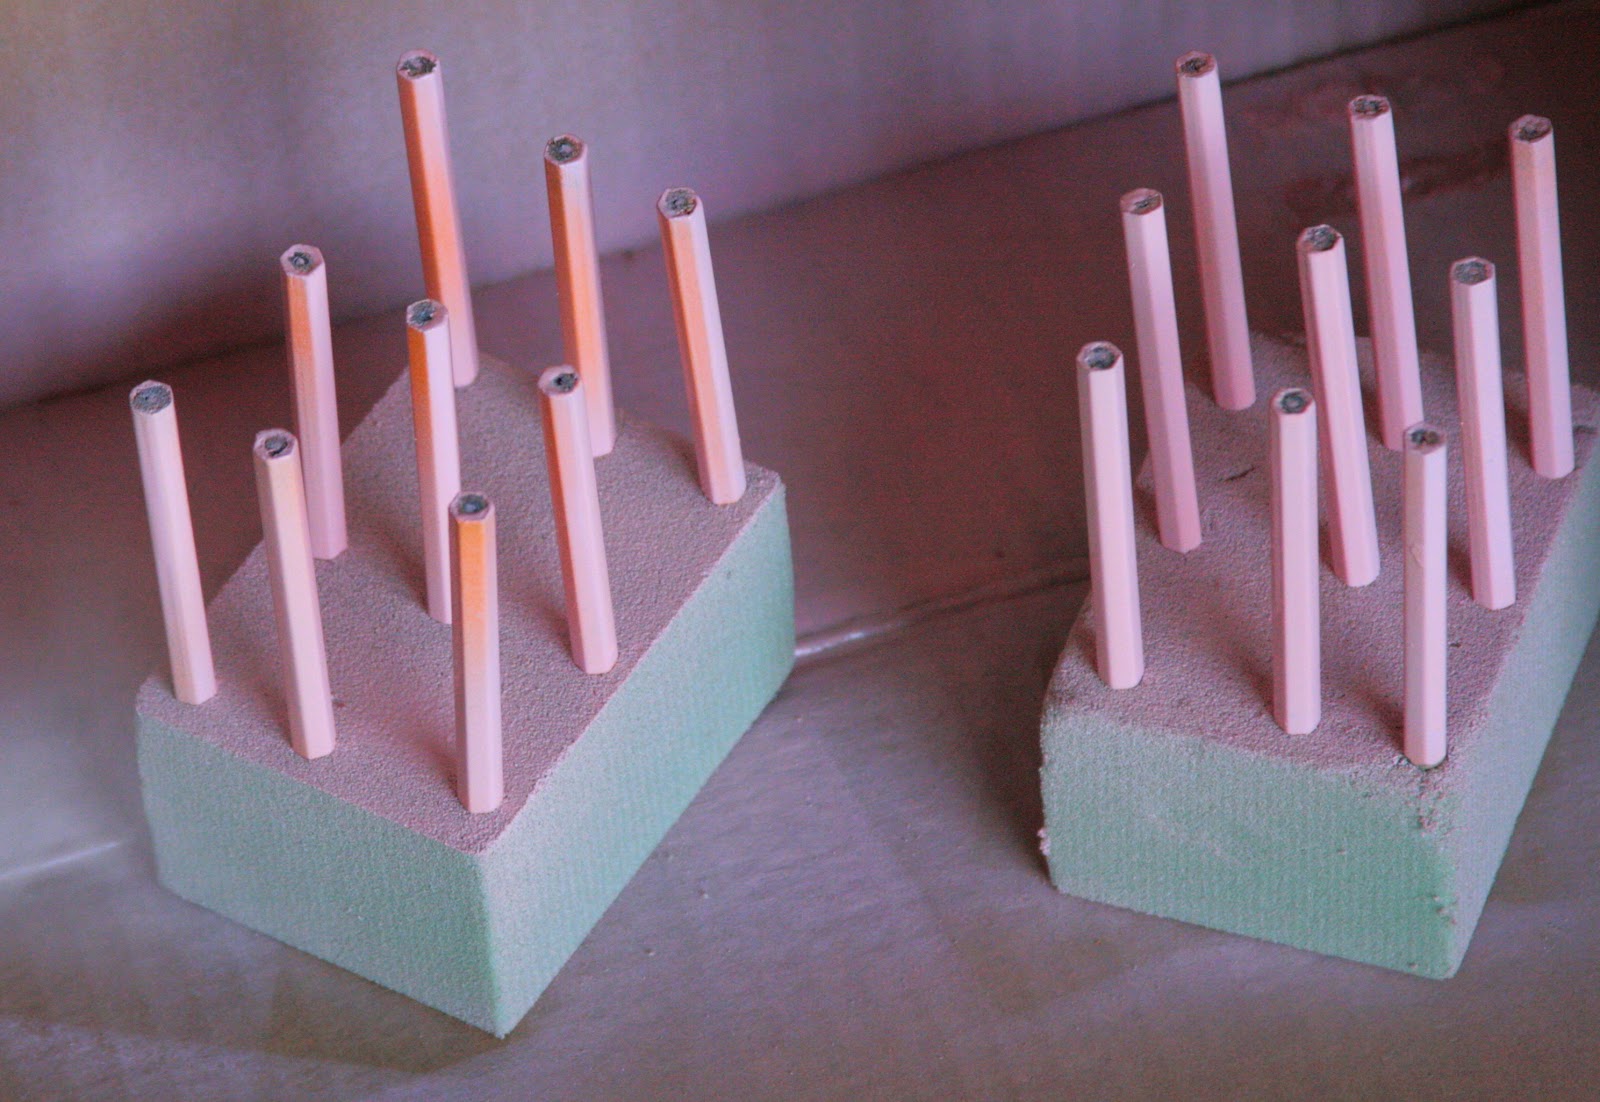
We (my husband helped on this project) poked the pencils into the foam just to the point where the exposed wood was completely covered.
We spray painted them, turning them and recoating until they were completely recovered.

Once they were completely covered we tipped them upside down to dry.
We waited one hour and then my husband hung them suspended by an opened coat hanger stretched out over a card board box.
We put the gray paint in a soda cap and I gently covered each pencil tip in the gray paint. We let them hang suspended over night to dry.
The next morning they were ready to go! I used a pencil sharpener to make sure the edges were completely pink.
I added a small pink washi flag to each pencil.
The pencils are secured with one glue dot at the top of each card. The game will be at each person's place setting.

Happy Crafting!

5.14.2012

Quick Tips

TIP ONE - THE TULIP TIP -
I love this first tip. It works every time and is so simple.
This is how my tulips usually look when I get them home from the store/farmers market.
Drop a penny in the bottom of the vase.
6 hours later the flowers are starting to perk up.
12 hours later (and for the duration of their life) they stand up perky and tall!

TIP TWO - THE DAWN TRICK
I always put stain remover on any spots or stains on my kids clothes right when they get out of the clothes. I am actually a little obsessed with getting stains out. I use Spray N Wash or Dreft Stain remover on everything. There have been few times lately (mainly with a red sauce stain) where my go to stain removers don't quite get the job done. I tried a little bit of Dawn Dishsoap and Voila! The super tough stains have come right out! Easy, inexpensive and effective!

5.12.2012

Spring is here!

In the Northwest we wait for Spring to arrive for a LONG time. I can officially say it is here and I am thrilled!
All of my bright, colorful spring decor is out.
I love the cheery pops of yellow around the hosue.
The flowers are blooming.
The grass is as green as ever.
And the skies are blue. It is perfect. But you know what the best part about the arrival of spring??? Summer is just around the corner!

Happy Spring!

4.06.2012

Candy Chicks

Easter is right around the corner! All of the pastel colors and sweet candy lining the aisles at the store bring a smile to my face. Such a fun holiday to celebrate with family and friends. My inspiration for these chicks were found here. I decided to make my chicks bigger and multi colored. These Hershey Milk Chocolate eggs were perfect for the project.
I decided to use gel icing I had on hand for the eyes and beaks. I had black and white. I used food coloring to get the orange for the beaks. I used a tooth pick to decorate with. They worked really well. My eggs did roll around quite a bit which was unnerving when they were wet. If I would have used a flatter candy it would have been better. I did end up putting the cookie sheet in the fridge over night to help the gel set.
All in all I was happy with the varying colors and the sweet little chick faces. These would be perfect in a small dish at an Easter party or brunch.

Do you have any simple easy Easter food projects?

Happy Decorating!

4.05.2012

Quick Organizing Tips

I have been sick this past week. I am so ready for a new month and a healthy start! I didn't take on many organizational projects this week feeling like I did. This was the one project I completed.

Ever since the big pantry redo (you can read about it here) all of our crackers, pastas, dried fruits, cereals, nuts, etc. are transferred from their original packaging to plastic organized storage containers in our pantry right when the items come home. We all love this system. It is so easy to find things and see how much we have left at any given time. The one issue we have is the overflow or extras that don't fit in the storage container. There aren't many of them but there are a few. Plus other misc. items like extra apple juice or applesauce. We have been storing these "extras" in our smaller pantry on the top shelf. The shelf was unorganized and beginning to drive me crazy.

I always have an extra set of these Ikea organizers on hand. They are intended to be used as clothing drawer organizers but I have used them for art supply storage, toy separators and drawer organizers. They are great and so inexpensive.

I like items being grouped together and contained in one area. These containers are perfect for what I needed. Now we have a designated space for the extras and it looks clean and neat. Plus it is easier to see what we have on hand. Took less than 5 minutes total.
I like to have extras of things we go through a lot - raisins, craisins, apple sauce, snacks, etc.
They fit next to the blender on the top shelf perfectly.

Happy Organizing!

4.02.2012

Home Made Granola Bars - YUM!

I saw this recipe on Pinterest last week and it instantly took me back to the child hood days of Quaker Granola bars. Don't they look just like them? I was immediately interested because of how easy the recipe sounded and looked! Here is the link to the recipe I tried initially. I have since tweaked it and love the results!

Here is the initial recipe:
No-Bake Chocolate Chip Granola Bars
adapted from Rachael Ray
Ingredients:
1/4 cup butter
1/4 cup honey
1/3 cup packed brown sugar
2 cups quick cooking oats {not rolled oats!}
1 cup crispy rice cereal
1/2 teaspoon vanilla
2 tablespoons mini chocolate chips
Directions:
In a large bowl, stir oats and rice cereal together. Set aside. In a small pot, melt butter, honey and brown sugar together over medium high heat until it comes to a bubble. Reduce the heat and cook 2 minutes. Pour in vanilla and stir. Pour over dry ingredients and mix well to moisten all ingredients. Pour into lightly greased small jelly roll pan {about 12x8x1} and press out to be about 3/4 inch in thickness. {If your pan isn’t small enough, pack the mixture into one side. You really want to press them down so they stick together.} Sprinkle with mini chocolate chips and press down lightly. Cool on a counter top to room temperature for two hours or until the chocolate chips are set before cutting into bars. Wrap in parchment or plastic wrap and store at room temperature.

The first night I made these last week I stuck to the recipe exactly. And the bars were so good. But they didn't hold together very well. I ended up putting them in the fridge and they held together nicely and didn't get too hard at all. My kids loved them!

I made the bars again tonight and did a double batch this time. The single recipe just doesn't make a very large quantity. I completely forgot to add the vanilla, I even had it on the counter and still forgot. And I added a half cup of peanut butter to the butter, brown sugar and honey. The bars held together so much better and they were delicious. Our little guy did not want to stop eating them!

This recipe to so easy to alter and I think we will try lots of variations. I have two friends who have made different variations in the last week. Lisa didn't use honey because she was making it baby friendly for her little one. She used Trader Joe's mango butter instead and she substituted yogurt covered raisins for the chocolate chips. Another friend eliminated the butter completely and used peanut butter instead and added craisins on top. Both turned out great!

Happy No Baking! :)

Pinterest Favorites

Another dose of Pinterest Favs with a hint of Spring and a dash of Easter! Happy week!
Sources: Fabulous laundry space, Marshmallow Bunny, Refreshing spritzer, Adorable Cupcake, Sugar Cookie Bar, Eggs, Good Advice